Practical Pointing Practices for Demos
A Never Stop Learning! Article
“There are always three demos for every one you actually gave. The one you practiced, the one you gave, and the one you wish you gave.”
– Dale Carnegie, paraphrased
It is exhausting to watch the small outline of a mouse zip around the screen, circling this, then that, then flinging itself in sweeping arcs, abrupt stops, and the occasional twitch – all in the first minute of a demo! So:
- Make it bigger.
- Fill it in.
- Move it smoothly and deliberately.
- Look and locate before moving.
- And more!
What’s in this article for you?
- General Great Demo! Pointing Principles
- Pointing Practices for Face-to-Face Demos
- Practical Pointing for Online Demos
- And a Few Ideas for Whiteboarding
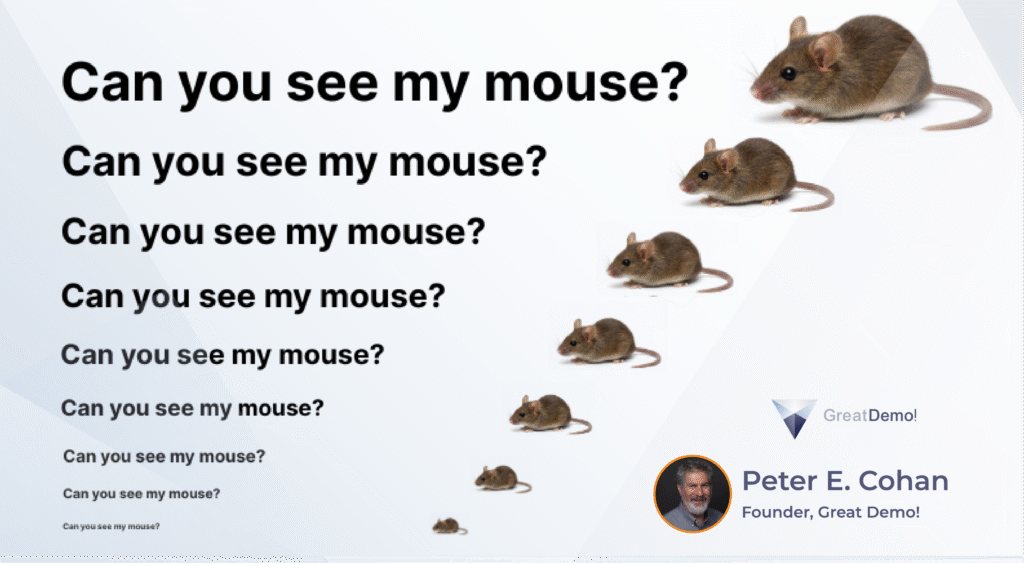
Can You See My Mouse?
Not easily!
The standard Mac and Windows mouse cursors are too small and too insubstantial for effective demos. Both offer a thin black outline and white body which are fine for your own work. After all, you (generally) know where your mouse is and where it is going!
However, that thin outline and white body can be tough to see as a demo audience member.
Solution?
Increase its size and fill it in to make it stand out clearly. I’d recommend increasing the size 2x and use black for the fill. Here are instructions for the current versions of Windows and iOS (thanks, Google!):
Windows 11: “You can change the mouse cursor in Windows 11 through Settings > Bluetooth & devices > Mouse > Additional mouse settings, or by going to Settings > Accessibility > Mouse pointer and touch. The first method lets you change entire pointer schemes or customize individual cursors by browsing for .cur or .ani files. The accessibility option allows you to quickly adjust the pointer’s size and color.”
Macintosh: “To change the cursor on a Mac, go to System Settings > Accessibility > Display > Pointer to adjust its size and color.”
Do it now! Next, share your screen with a colleague (over the web) or grab a colleague (in office) and ask for feedback: How easy is it to see the mouse? Too large, too small? Adjust and refine!
Be Aware!
If you are working from a large monitor and are presenting over the web to an audience that is using smaller monitors or laptops, they may still have challenges seeing your mouse clearly. That’s due to the “squeezing” of your very high-resolution screen down to your audience’s more limited screen resolution, making everything on your screen look correspondingly smaller.
That includes your mouse and all text and graphics elements. Do some tests to see the impact yourself.
Solution?
You may need to change the resolution of your monitor to match or get closer to those of your audience.
Older Audience?
Next, where do high-ranking audience members tend to sit in a demo meeting, particularly in face-to-face demos?
Up front? Not typically! They tend to sit in the rear of the room.
And are they generally younger or older? Well, it depends on the nature of your prospect and vertical, but in many organizations the highest-ranking people also tend to be the oldest.
And how are their eyes and their vision?
They’ve likely seen better days (my apologies for the pun)! So do them and yourself a favor by ensuring that the most (ahem) seasoned folks in your audience can see everything you want them to see. One of the best ways to do this is to grab one or more of your most mature (in age) colleagues and test, both in face-to-face situations and over the web.
Please Stop!
Have you ever seen a demo where the presenter circles their mouse around and around and around (and around and around) a screen element? One circle is helpful; each additional circumnavigation is simply annoying!
And eventually, that constant gyration actually tires audience members’ eyes, forcing them to look away!
Solution?
Move your mouse smoothly and deliberately to the screen element you wish to highlight. Circle it no more than once, then stop your mouse so that the pointer points directly at the element. For most cursors that means your mouse should stop slightly below and to the right of the desired element.
Practice this: It may take a while to make it an unconscious, consistent habit!
Look, Find, and Then Move
Let’s run a quick experiment: Open an existing document in MS Word. Now, choose “Review” and then “New Comment.” (Or “Suggesting” and “Add Comment” in Google Docs.) I’ll bet that your mouse followed your eyes as you hunted for these two commands, whizzing back and forth across the top of the screen until these commands were located!
When we mouse for ourselves, our mouse cursor tends to follow where we are looking. But that is not a good practice for demos! Every additional non-productive mouse movement fatigues our audiences’ eyes and brains.
Solution?
Look, find, and then move.
In your demos, don’t move your mouse until you have located, with your eyes, the command, button, or screen element you wish to click or highlight. Then, move your mouse smoothly and deliberately from its current location directly to that element.
Bonus best practice?
Once you have found that element, circle it once (if desired), next move your mouse so it points directly at the element, and then take your hand off your mouse!
I have found that inanimate mice rarely move on their own…
A True Story
I opened this article with, “It is exhausting to watch a small outline of a mouse zip around the screen, circling this, then that, then flinging itself in sweeping arcs, abrupt stops, and the occasional twitch – all in the first minute of a demo!” This manic movement is the key symptom of a horrible, but curable demo disease known as “Zippy Mouse Syndrome.”
Zippy Mouse Syndrome is a common affliction amongst those who move mice in demos. But aimless circling and wild movements make it hard for prospects to stay engaged. Here’s a true story to give you an example of this debilitating affliction!
“That’s a Zippy Mouse!
We were on booth duty the morning after a long, but enjoyable evening on Bourbon Street listening to Dixieland. Well, I’d been in a club taking in the music, Kevin had been elsewhere and had returned to the hotel on the late side of night or perhaps more accurately, the early side of morning.
While I wasn’t feeling my best, Kevin appeared to be his normal, remarkably chipper and vibrant self. Or perhaps it was a few healthy doses of caffeine.
While Kevin staffed a demo station, my job was to trawl for prospects lurking in the shadows just beyond our booth. Many folks would stand just out of range, so to speak, and I’d learned that if you walked directly up to them, you’d likely scare them away into deeper water.
Instead, I applied what chemists would call an SN2 backside attack. I would note my target’s location and circle around, finally approaching them from behind and sidling up alongside. After a moment, I’d ask, “What caught your attention about our booth?”
Surprised, they’d admit they were interested in one product or another but were clearly holding back, cautious to engage. I’d ask, “Would you like a brief demo of that offering?”
Most prospects replied, “Sure.” And I’d escort them to Kevin’s demo station.
To fully set the scene, you need to visualize a very bright, earnest, smiling character in his late twenties, attired in a button-down long sleeve shirt topped with a handtied bowtie. Nearly a clone of Pee-wee Herman (in his prime)!
The gentleman who I brought over to Kevin this particular time had a deep Texas drawl that was slow, mellifluous, and filled with inspirational homilies.
Our software was a rich database of organic synthetic reactions, with the ability to search for specific chemicals, reactants, and products. After showing a brief and compelling example of what the tool could do, we would invite our prospect to suggest their own search.
“Would you like to look for something you are working on?” suggested Kevin.
“Could ah? Why, certainly!” our prospect replied. He drew a few structures on a sheet of paper and Kevin got to work forming a search query. As Kevin labored, the mouse moved furiously around the screen and as he paused to think, the mouse twitched, circled aimlessly, and migrated wildly from location to location.
“Son, y’all should put the brakes on that mouse,” intoned our guest.
Kevin glanced up and smiled, then returned to drawing the desired reaction.
Our prospect watched for another moment then gently reached down and placed his hand on Kevin’s, saying, “Son, y’all’ve got a real zippy mouse there! Can ya sloooooooow it down?”
There were two pieces of good news that came from this interaction. First, this prospect did end up licensing our software and became a strong supporter, serving as a reference, and providing terrific talks at our users’ conferences.
Second, Kevin did learn to slow his mouse down.
Moral: Zippy Mouse Syndrome is curable!”
(“That’s a Zippy Mouse” is one of the 35 short stories in Suspending Disbelief: A Collection of Sales, Presales, and Marketing Stories (and Lessons Learned) – enjoy!)
Thankfully, no surgery or drugs are needed. Practicing smooth and deliberate movements, including Look, Find, and Then Move will help you form the habits that yield markedly improved demos and grateful audiences!
Click-Click-ClickClickClickClickClickClick…!
I was watching a demo from the founder of a startup who was excited to share his new technology. I was amazed, but not in a good way, of how fast he drove through his software!
If clicking the most buttons and commands in the least time and moving as fast as possible from screen to screen were an Olympic sport, he’d have definitely qualified for the finals! However, demos are where “slow and steady” truly wins the race.
Your objective is clear communication, not speed. Execute a function, point precisely, and describe what the feature provides, how it solves your prospect’s business issues, and the value your prospect can expect to enjoy using the feature. Summarize as appropriate, particularly for longer pathways.
Then pause.
Let your audience take it in. Give them a chance to offer a comment or an observation or frame a question. Linger lovingly over your most exciting and valuable capabilities – give them time to sink in and resonate!
If you are limited in time, then apply the inverted pyramid approach and choose the few most important ideas to present. (And note that it is rare that we are not limited in time!)
Finally, slowing down is even more important when you are presenting to audiences who are not native speakers of your language. You may enjoy exploring Chapter 14 “Style” in Great Demo! for more guidance on the use humor, language, appearance, buzzwords, pace, props and visual aids, and other practices in your demos.
OK, you’ve tamed your over-enthusiastic mouse, let’s discuss other methods of pointing!
Face-to-Face Demos
In face-to-face demo meetings you have several options for pointing, including your mouse, your hands and fingers, plus physical pointers including old-school stick, telescoping, and laser pointers.
All of the practices discussed above apply to your mousing in face-to-face demos, so let’s explore using your hands and fingers as alternatives.
I Have to Point This Out!
Be aware of how you point in your face-to-face demos – you may not realize what you are communicating!
On a Mediterranean island, I was watching a tour group listening to their guide pointing to a map of an ancient megalithic complex, when I noticed the group laughing and smirking as their guide identified features on the map.
What was going on?
I realized the guide was pointing using their middle finger, and the tour group was from North America. From the group’s perspective, their guide was “flipping them off!”
In many cultures, the logical finger for pointing is the middle finger, since it is the longest. In other cultures, the index finger (or forefinger) is preferred. And in other cultures, pointing directly at someone with a finger is rude!
Solution?
Use the Two-Finger approach: This is the clearest method of pointing with the least risk of offending people!
Note that many airline flight attendants use the Two-Finger method during their safety briefings for the same reasons. Get the point?
Next best is to use your full hand, with your fingers together. This is the typical method of pointing, or directing attention, for a number of cultures including Japan.
Get Up!
I’ve done the research, and I have yet to find seatbelts, straps, or other rigging that ties or bolts you to your chair in face-to-face demos. And sitting for a half an hour or longer in a chair is boring – both for you and your audience.
Solution?
Get up and go to the screen!
Complete a demo pathway and then get up from your chair, move to the display screen, and point precisely at the desired software element as you communicate the capability and its value, or provide an interim summary.
The act of moving will refresh you and your audience!
Tap the Screen!
This practice is not obvious but can be surprisingly effective.
It turns out that engaging more than one of our five senses increases the retention of information by ten percent for each additional sense that is triggered:
– Seeing provides its own 10%.
– Hearing offers another 10%.
– Smelling – 10%.
– Tasting – 10%.
– And touching – another 10%.
Accordingly, seek to involve as many senses as possible in your interactions with prospects. In Great Demo! Workshops, I would demonstrate how to present an Illustration as a paper printout by showing it, describing it, snapping it, and finally handing it to a participant.
By doing so, I engaged sight (twice, first by holding it up in front of the class, and second when the participant examined it personally), sound (twice, via the description and then by snapping the paper), and touch. I’d often ask the participant to pass the example printout around the room, enabling the balance of the group to view and touch the piece as well. (Bonus: You can almost smell the ink drying!)
So, when possible, tap the display screen as you point with your two fingers, hand, or physical pointer. The audible sound supports and reinforces your communication. (Just make sure you won’t harm the display device when you do this!)
Beware of Laser Pointers
I’m not a fan. Why?
- In some countries, they are banned or highly restricted! This includes Australia, Austria, Germany, Greece, Ireland, Italy, Liechtenstein, the Netherlands, Poland, and Switzerland, for example.
- They are often too bright, overpowering and distracting from the element you wish to highlight.
- They are difficult to hold steady (yielding another debilitating disease, Zippy Laser Syndrome!)
- They don’t work on certain displays.
- And their batteries die at the worst possible time!
Solution?
Use your fingers or hands or go old school and use a stick or telescoping pointer. I’m a fan of telescoping pointers as they are easy to carry and can also serve as props or visual aids.
What About Not Pointing?
This may not be obvious, but many presenters frequently don’t point at all! (Which can make their demos, well, pointless!)
Consider: When you verbally present a software screen without any visual direction, your audience doesn’t know where to look, causing confusion due the conflict between their eyes and their ears!
Why?
When you, as an audience member, look at a screen you’ve never seen before, your eyes wander as your brain tries to decipher what you are seeing. You see a big red number, but don’t know what it means. You see a bar graph, but don’t understand the x and y axes. You see a table of data but again have no clue what it represents.
Even worse, if the presenter is talking while you are working to understand what you are seeing, but you don’t hear their words since you’re focused on the screen. Similarly, if you listen carefully to the presenter, you can’t visually explore the screen at the same time.
You have a serious disconnect!
Solution?
When you are presenting software screens, guide your audience’s eyes by precise pointing to exactly what you want them to view as you describe it.
Online Demos
There’s an entire chapter in Great Demo! on presenting demos over the web (Chapter 13, Virtual Demos) for your perusal, but in addition to the basic mouse management principles covered earlier, here is one HUGE additional piece of guidance:
Use the annotation tools!
Zoom, Google Meet, and even Teams (finally!) all offer a range of annotation tools. These typically include lines, shapes, and freehand drawing, at minimum. Think of these tools as your online fingers, hands, or other pointing devices.
And use them! The act of a new and unanticipated graphic appearing on the screen engages and refreshes your audience.
Want to direct your audience’s eyes to that key metric on your dashboard? Grab an annotation tool and circle it, or underline it, or enclose it in a box.
Need to draw your audience’s attention to the small graph in the middle-right portion of your screen? Deploy that annotation tool and highlight that graph!
Have a piece of text that you’d like to point out? Select an annotation tool and do so!
Bonus: As your start your demo, ask your audience what color they’d like you to use for your annotations. What a great way to engage, right from the beginning of your demo.
Can You See My Mouse Here and Here?
Another terrific way to engage online and to confirm that your audience can see your full screen is to move your mouse to the top-left corner of your screen and ask, “Can you see my mouse in the upper-left corner of the screen?”
Assuming the verbal responses from your prospect are in the affirmative, smoothly move your mouse to the bottom right corner and ask if they see it there, as well. A positive reply confirms they are seeing your full screen real estate and you’ve gently (but firmly) driven interaction even before the formal demo begins!
Whiteboarding
Presenting screen after screen after screen of software can get boring. Contemplate moving away from your software, when the opportunity arises, and work from a whiteboard (or flipchart if people are still using papyrus, or chalkboard if they are still operating in the neolithic period).
Whiteboards provide the ability to develop ideas from a blank page, increasing audience engagement and refreshing their attention. The act of grabbing a marker and poising it over a whiteboard surface causes your audience to wonder, “What are they about to draw?”
And, when face-to-face, use Two-Finger or full-hand pointing and remember to tap the whiteboard surface to take advantage of the audible reinforcement.
Can you use whiteboarding with online demos?
Yes, and you should! Zoom, for example, offers a rich palette of whiteboarding capabilities. Google Meet includes Jamboard, and Teams offers Microsoft Whiteboard (my, what a clever name!). In all cases, you should familiarize yourself with the tools available to you and practice using them before you present to real prospects!
Get the Point?
Pointing in demos is much more than just wiggling one’s mouse around. Effective pointing requires smooth, deliberate movements that require practice to turn into habits.
When should you practice? All the time!
Practice your mousing while you are working, without any audience present. Practice Two-Finger or full hand pointing when communicating with your colleagues. Practice annotating over the web during your sessions within your company and get feedback on what looks most effective. Practice whiteboarding in an empty conference room and practice deploying and using online whiteboards.
And if you see a colleague whose demos are comparatively pointless, teach them the methods that work the best for you and your market!
Copyright © 2025 The Second Derivative – All Rights Reserved.
To learn the methods introduced above, consider enrolling in a Great Demo! Doing Discovery or Demonstration Skills Workshop. For more demo and discovery tips, best practices, tools and techniques, explore our blog and articles on the Resources pages of our website at https://GreatDemo.com and join the Great Demo! & Doing Discovery LinkedIn Group to learn from others and share your experiences.